The solar powered electric fence controller offers a convenient and cost-effective solution for powering your fence. By harnessing the energy from the sun, this controller eliminates the need for frequent battery recharging or replacement. It is designed to collect and store solar energy even during cloudy weather conditions, ensuring a continuous power supply for your fence line.
One of the key advantages of this solar powered controller is its ability to retain a full charge for up to 15 days of total darkness. This means that even during periods of no sunlight, your fence will still maintain maximum shock capability. This feature not only provides peace of mind but also saves on energy costs.
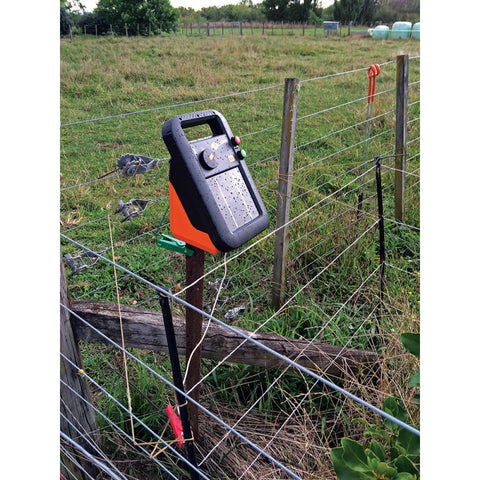
Installing the solar powered fence controller is a straightforward process. First, ensure that the solar panel is facing towards the noontime sun, preferably in a location that receives full sunlight throughout the day. It's important to securely fasten the controller to prevent any turning or shifting.
Connecting the lead-out wire to the fence terminal and the ground wire to the ground terminal is the next step in the installation process. This ensures proper electrical connectivity and grounding for effective fence operation.
For solar fencers with a solar setting switch, it's important to set the switch based on your geographic location. The solar fencer installations north of the specified line on the solar setting map have less usable sunlight compared to those south of the line. Therefore, adjust the solar setting switch accordingly to optimize performance and battery life. If unsure about the installation location, it's recommended to set the switch to the northern region setting.
If your solar fencer does not have a solar setting switch, simply slide the 2 position switch to the on position.
To achieve the best performance from your solar fence controller, it is advised to initially slide the switch to the "OFF" position. This allows the solar battery to fully charge over a period of three days. It is important to repeat this charging process whenever the fence controller is placed in storage or taken out of storage, to maintain the battery's longevity.
Proper battery maintenance is crucial for the optimal functioning of the solar powered electric fence controller. When storing the controller for periods exceeding 3 months, it should not be kept out of direct sunlight. Before storage, repeat the battery charging procedure to prevent battery failure. It is essential to avoid charging the battery with an automobile battery charger, as this can cause damage. Instead, use a trickle charger to maintain the battery when the fence controller is not in use.
Caution should be exercised when using a trickle charger, as the battery should not be charged for more than 18 hours.
In conclusion, the solar powered electric fence controller offers a convenient and environmentally friendly solution for powering your fence. With its ability to collect and store solar energy, it eliminates the need for frequent battery recharging or replacement. Proper installation and battery maintenance ensure optimal performance and longevity of the controller.